




Your Health Magazine Contributor
4201 Northview Drive
Suite 102
Bowie, MD 20716
More Parenting and Family Health Articles
How to Clean Breast Pump Parts After Each Session – 6 Simple Steps
At 2 a.m., the milk is safely stored, but cleanup is not over. Bottles, flanges, and valves still need washing, while the pump motor has to stay dry. Cleaning breast pump parts after each session gets easier once you know which pieces to wash, how to air-dry them, and where to store them. We’ll also look at tubing and pump-body care and explain when sanitizing is needed. For pumping away from home, you’ll find tips for handling used parts and a short checklist for the next session. Care instructions vary by model, so check your pump manual before washing or sanitizing any part.
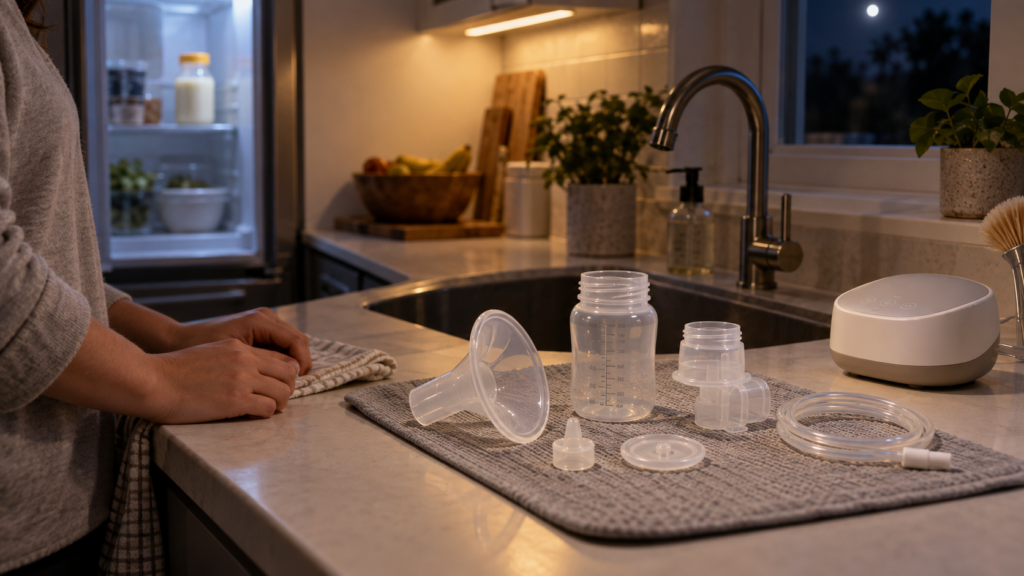
Alt: Breast pump parts awaiting cleaning after a nighttime pumping session
Follow This Sequence Right After Pumping
Step 1 – Safely Store Your Expressed Milk
Cap collection bottles or seal milk‑storage bags. Label each container with the date and time, then move it right away to your refrigerator, freezer, or an insulated cooler with ice packs.
Step 2 – Wash Hands and Set Up a Clean Workspace
Wash hands thoroughly with soap and water. Gather a dedicated clean wash basin, mild dish soap, and any brush approved by your pump manual for baby‑feeding items. Do not place pump parts directly into your kitchen sink.
Step 3 – Disassemble and Inspect All Milk‑contact Parts
Take apart every component that touches your breast or breast milk: collection cup, flange, connector, valve, and membrane. Look closely for trapped milk residue, cracks, chips, or warping. Damaged parts need replacement before your next pumping session.
Step 4 – Wash Milk‑contact Components
Choose hand washing or dishwasher cleaning based on your pump manual’s instructions.
Hand Wash in a Dedicated Basin
- Rinse each part under running tap water to flush away leftover milk.
- Place items inside your separate wash basin with hot water and dish soap. Scrub gently. Only use a brush if your manufacturer permits it; brushing can scratch and damage delicate silicone parts.
- Rinse all pieces completely under fresh running water.
Dishwasher Cleaning (Only for Dishwasher‑Safe Parts)
- Put small pieces inside a closed mesh basket so they do not fall through racks.
- Run your dishwasher using hot water plus a heated dry or sanitizing cycle.
- Remove pieces using clean hands. Leave any still‑damp items out to finish air‑drying.
Step 5 – Clean Your Wash Basin and Brush
Rinse out your wash basin and cleaning brush after every use. Set them aside to fully air‑dry. Every few days, wash them by hand or dishwasher (if safe). Store these tools separately from regular kitchen dishware.
Step 6 – Air‑dry Fully Then Store to Avoid Recontamination
- Lay cleaned parts on unused paper towels or a purpose‑made drying rack in a spot shielded from dust and dirt. Give each piece space for airflow.
- Do not wipe dry with kitchen towels — cloth towels carry lint and germs. Allow every surface to dry completely. Trapped moisture inside valves or flanges creates mold risk.
- Once everything is dry, wash your hands again, reassemble your pump kit, and store inside a sealed clean bag or covered container. Never seal damp pump parts.
How to Clean the Pump Body and Tubing Without Damage
Keep the motor housing, battery compartment, charging contacts, and pump hub out of the water. Wipe the outside with a clean, soft cloth or paper towel, and clean up any milk spills promptly. Check your pump manual for the cleaning instructions specific to your model.
Tubing usually needs no washing if milk has not entered it. If you see condensation, check how your manual says to dry it. Some pumps allow you to run the motor briefly. If milk or mold gets inside the tubing, replace it, since the inside can be hard to clean thoroughly.
Wearable pumps have no external tubing to deal with, but the parts that touch milk still need attention. When comparing models, look at how many pieces come apart and whether the valves, narrow openings, or silicone parts are easy to wash and leave to dry.
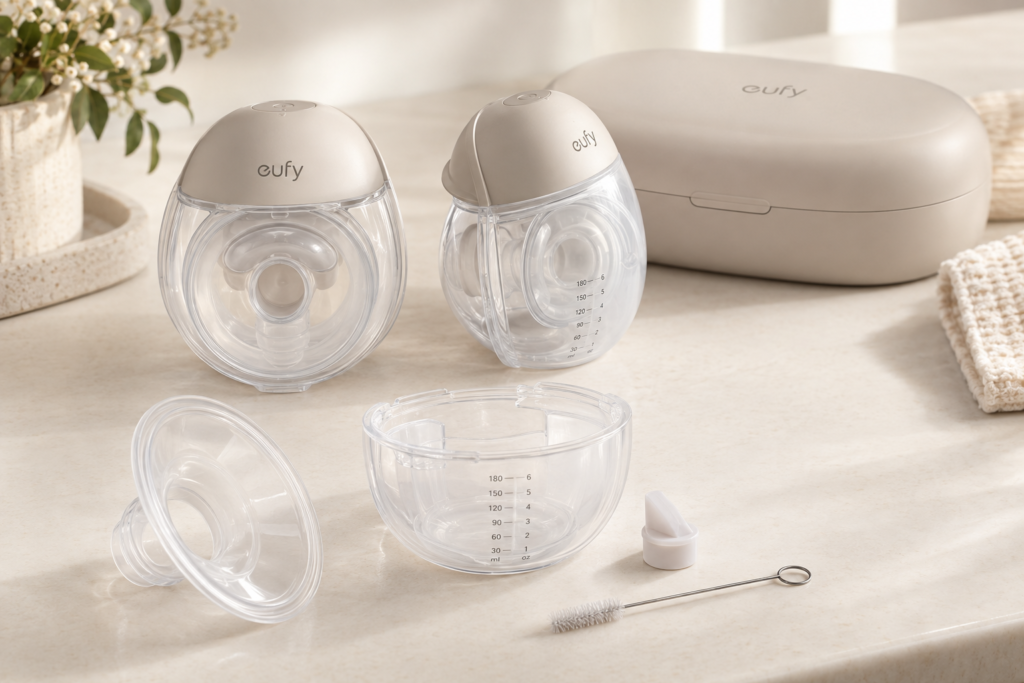
Alt: eufy S2 Pro pumps and washable parts arranged for cleaning
The eufy Wearable Breast Pump S2 Pro may suit parents who want a more clearly defined cleanup routine. Its wearable design uses a compact set of washable milk-contact components, while the pump hub remains dry. Rinse the washable parts with warm, soapy water, then leave them to air-dry. Use the supplied brush to clean the duckbill valve. The pump hub stays dry: if milk spills on it, wipe it with a dry cloth instead of rinsing it. That is one less part to wash after a late-night session or while pumping away from home. Check your model’s current instructions before washing or sanitizing any part.
When Routine Cleaning Is Enough and When You Need Sanitizing
Cleaning after every pumping session is the baseline routine because it removes milk residue and most germs. Sanitizing provides extra protection, but it should only be done after the parts have been thoroughly cleaned.
The CDC says to sanitize washable pump parts at least once a day if your baby is under 2 months old, was born prematurely, or has a weakened immune system. Clean and sanitize the wash basin and bottle brush too. If your baby is older and healthy, washing the parts well after each pumping session may be enough. Check the pump manual before boiling, steaming, or running parts through a dishwasher sanitizing cycle, since not every material can handle high heat. When dishwasher-safe parts are washed with hot water and a heated-dry or sanitizing cycle, you may not need to sanitize them again.
Managing Pump Cleaning While at Work or Away From Home
Cleaning pump parts can feel challenging when you are away from your kitchen. Use these practical, guideline‑aligned tips.
- Pack one full spare clean pump kit for each pumping session you will complete outside home, plus a separate sealed bag for used parts. This removes pressure to clean parts in shared public sinks.
- Pump‑specific sanitizing wipes can wipe external pump surfaces, but they cannot replace soap‑and‑water washing for milk‑touching parts.
- Refrigerating used pump parts for a few hours is a temporary workaround if you cannot wash right away. Rinse parts first and seal them inside a bag. Keep in mind refrigeration only slows bacterial growth and is not considered an equivalent safe replacement for washing. This workaround is not recommended for premature or immunocompromised infants.
Inspect Parts Before Every Next Pumping Session
Before you start pumping, examine all components under good lighting:
- Discard any parts with cracks, tears, warping, or persistent dried‑on milk residue.
- Never use sharp objects to scrape residue out of small openings.
- Only reassemble fully dry pieces. If the pump leaks or the suction feels weaker, check that the parts are fitted together properly. Look for worn valves or other pieces that may need replacing.
Replacement schedules vary by pump, so check your manual rather than relying on a general rule. If you’re comparing breast pumps, look at each model’s cleaning instructions and whether genuine replacement parts are available.
Conclusion
Stick to this repeatable workflow after every pumping session: safely store milk, wash your hands, fully disassemble milk‑contact pieces, wash with approved methods, air‑dry completely, and store in a protected clean space. Keep all motor‑powered pump hardware dry. Add daily sanitizing if your baby’s age or health condition calls for extra protection. Reading your pump’s official cleaning manual before purchase helps you pick a model that fits your real‑world daily routine.
Other Articles You May Find of Interest...
- Non-Invasive Prenatal Paternity Test (NIPP): How It Works & When You Can Take It
- How to Clean Breast Pump Parts After Each Session – 6 Simple Steps
- Why European Formulas Skip Corn Syrup and Palm Oil: A Label-Reading Guide for US Parents
- 7 Things Families Need From an ABA Therapy Provider
- What Parents Should Know About Introducing New Partners After Divorce
- Why Major Family Milestones Can Feel So Meaningful
- What PPEC Services Actually Include